Three Reasons To Identify Why Your Window Pane Repair Isn't Performing (And How To Fix It)
Window Pane Repair: A Comprehensive Guide
Window panes are a vital part of any home, offering insulation, security, and aesthetic appeal. Gradually, however, window panes can end up being harmed— whether due to weather, unexpected effects, or age. Repairing window panes is not just essential for keeping the stability of windows however also for protecting energy effectiveness and security within a home. This article looks into the procedure of window pane repair, outlining steps, strategies, and pointers to tackle typical issues effectively.
Comprehending Window Pane Damage
Window panes may experience a range of damages, consisting of:
- Cracks and chips: Caused by effects, temperature level changes, or settlement.
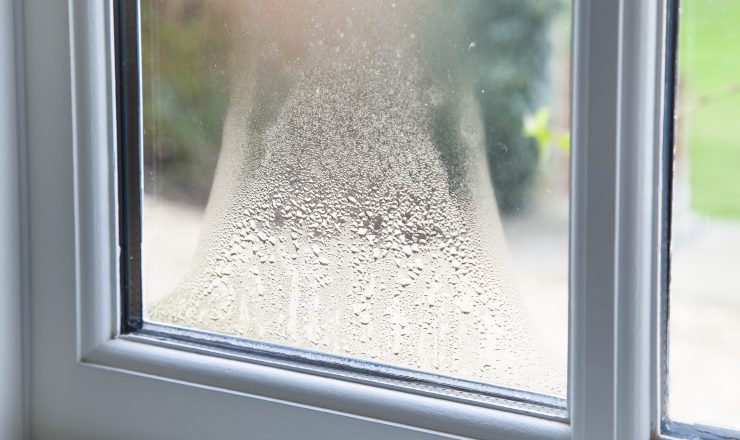
- Foggy or cloudy glass: Often an indication of seal failure in double-pane windows.
- Scratches or abrasions: Resulting from inappropriate cleaning or environmental factors.
- Dripping seals: Allowing air and moisture to prevent the glass, which might result in mold development.
Understanding the kind of damage is essential as it affects the repair method.
Common Tools and Materials for Window Pane Repair
Before starting a window pane repair project, it's important to gather the essential tools and products. The following table describes common items required:
Tool/Material
Purpose
Shatterproof glass
Protect eyes during repair
Gloves
Protect hands from sharp edges
Putty knife
Get rid of old putty or caulk
Glass cutter
Cut glass to preferred size
Replacement glass
New glass for damaged panes
Glazier's points
Hold the glass in the frame
Window putty
Seal and cushion the glass
Caulk
Weatherproofing and sealing
Sponge or cloth
Tidy surfaces before and after repair
Actions for Window Pane Repair
Depending upon the kind of damage, various techniques may be employed in the repair procedure. Below is a basic outline for repairing a split or broken single-pane window.
1. Security First
Before starting, ensure security by using gloves and safety glasses to secure against glass fragments and other risks.
2. Evaluate the Damage
Examine the window pane completely to figure out if it can be repaired or if it requires complete replacement. Small cracks and chips can typically be repaired; however, significant breaks might require changing the entire pane.
3. Remove the Damaged Pane
- Utilize a putty knife to carefully get rid of the putty or caulk surrounding the window pane.
- If it's a single-pane window, gently press the glass from the frame.
- For double-pane windows, beware as the glass is generally sealed within the frame.
4. Measure and Cut Replacement Glass
- Step the opening where the glass will fit specifically.
- Use a glass cutter to cut the brand-new glass to the required dimensions.
- Guarantee the edges are smooth to avoid injuries.
5. Set Up the New Glass
- Place the glass into the frame, ensuring it fits safely.
- Use glazier's indicate hold the glass in place during the sealing process.
6. Seal the Edges
- Apply a generous quantity of window putty around the edges of the glass.
- Utilize a putty knife to smooth the putty for a clean surface.
- For extra defense versus the weather condition, apply caulk along the outside edges.
7. Clean Up
- Clean any excess putty or caulk with a damp cloth.
- Clean the recently installed window pane for clearness.
8. Permit to Cure
- Enable the putty and caulk to treat as per manufacturer recommendations before exposing the window to weather conditions.
Upkeep Tips for Window Panes
To avoid future damages and ensure the durability of window panes, think about the following maintenance pointers:
- Regular Cleaning: Clean the window panes routinely to prevent accumulation of dirt and gunk, which can cause scratches.
- Examine Seals: Periodically inspect for fractures in the sealant around windows and reseal if required.
- Address Weathering: Apply weatherstripping to enhance energy efficiency and avoid moisture from seeping in.
- Screen Temperature: During severe climate condition, be careful of temperature variations that might stress the glass.
Regularly Asked Questions (FAQs)
Q1: Can I repair a double-pane window myself?
A1: While it is technically possible, repairing double-pane windows is more complex due to the requirement for vacuum sealing and unique materials. It is frequently suggested to speak with a professional for this type of repair.
Q2: How long does window pane repair take?
A2: Simple repairs on single-pane windows can take a couple of hours, including drying time for the putty. More comprehensive repairs, such as those on double-pane windows, may require longer to make sure correct sealing.
Q3: What should I do if a window pane breaks throughout a storm?
A3: If safe to do so, remove any remaining fragments and cover the opening with a board to safeguard versus weather and bugs. Secure a professional repair as soon as possible.
Q4: Is it economical to repair a window pane?
A4: Repairing a window pane is generally more cost-effective than replacing the entire window. However, Misted Window Repair Cost or repeated issues may need a more thorough option.
Repairing a window pane is a workable job for house owners ready to invest time and effort, assisting keep the convenience and security of their home. By following the detailed actions and utilizing the right tools, individuals can efficiently repair window panes, guaranteeing their homes remain secure and energy-efficient. With appropriate maintenance and timely repairs, window panes can continue to serve their purpose for many years, improving both performance and visual appeal in any home.